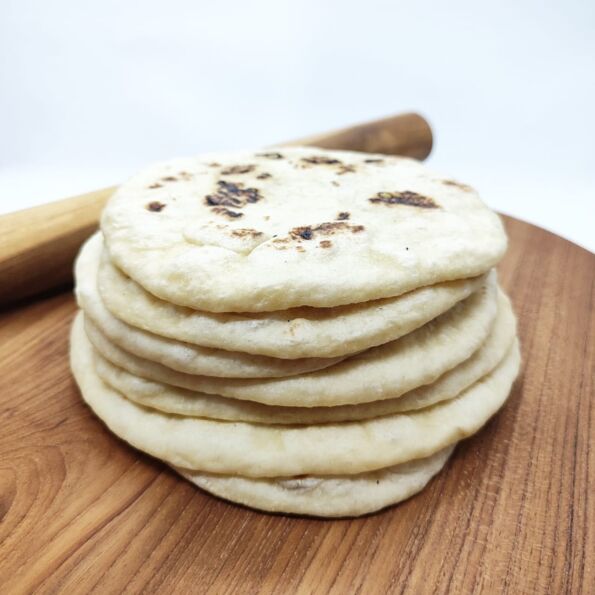
Pita Bread Recipe with Stove

Ready to spice things up and add a touch of homemade flair to your meals? Well, you're in for a treat because today, we're diving headfirst into the world of pita bread—no ovens required! Say goodbye to the store-bought stuff and hello to the thrill of making your own pita right on the stove.
No need for a fancy oven or intricate gadgets; just a dash of enthusiasm and a pinch of kitchen curiosity. Picture this: golden-brown perfection, that satisfying puff, and the unmistakable aroma of fresh bread wafting through your home. Excited? You should be!
This isn't your grandma's recipe; this is a pita party waiting to happen! So, grab your apron and let's roll up our sleeves for a pita bread fiesta that's all about fun, flavor, and a touch of kitchen wizardry. Welcome to the coolest pit-stop on your culinary journey!
Look into a diverse range of recipes that align with your taste:
Get ready to indulge in the irresistible taste of freshly stove-cooked pita bread, where the golden-brown exterior provides a delicate crunch, yielding to a soft, pillowy interior that dances on your taste buds with a perfect blend of subtle olive oil richness and a hint of rustic warmth.
- 2 cup all purpose flour
- 1/2 tsp salt
- 1 tbsp yeast
- 1/2 tbsp sugar
- 1 tbsp olive oil
- lukewarm water
Start by combining the all-purpose flour, salt, instant yeast, and sugar in a large mixing bowl. Mix them thoroughly to ensure an even distribution of the yeast and sugar.
Next, create a well in the center of the dry mixture and pour in the olive oil. This addition will infuse your pita bread with a subtle, savory flavor.
Gradually add lukewarm water to the mixture, stirring continuously until the dough begins to come together.
Knead the dough on a floured surface for about 5-7 minutes, or until it becomes smooth and elastic. The consistency should be soft but not sticky. If needed, add more flour or water in small increments to achieve the desired texture.
Place the kneaded dough in a lightly oiled bowl, cover it with a damp cloth, and let it rise in a warm environment.
Allow the dough to double in size, which typically takes around 1 to 1.5 hours. During this time, you can prepare your stove and pans for the cooking process.
Once the dough has risen, gently punch it down to release any air bubbles. Divide the dough into smaller, golf ball-sized portions. On a floured surface, roll each portion into a smooth ball.
Using a rolling pin, flatten each ball into a round disc, aiming for a thickness of approximately 1/8 to 1/4 inch. The key is to achieve an even thickness to ensure uniform cooking.
Heat a non-stick skillet or griddle over medium-high heat. Place the flattened dough onto the hot surface and cook for about 1-2 minutes on each side or until you see the characteristic puffing that indicates the formation of the pita pocket.
Keep a close eye on the cooking process, flipping the dough when you start to see bubbles forming. The high heat is essential for the rapid expansion of the dough, resulting in that coveted pocket.
Once your homemade pita bread has achieved a golden-brown color on both sides, remove it from the heat and let it cool for a moment. The steam trapped inside will continue to cook the bread slightly, ensuring a soft and chewy texture.
Servings 8
- Amount Per Serving
- Calories 133kcal
- % Daily Value *
- Total Fat 2.1g4%
- Saturated Fat 0.3g2%
- Sodium 2423mg101%
- Potassium 34mg1%
- Total Carbohydrate 25g9%
- Dietary Fiber 1.1g5%
- Sugars 0.6g
- Protein 3.2g7%
- Calcium 6 mg
- Iron 2 mg
* The % Daily Value (DV) tells you how much a nutrient in a food serving contributes to a daily diet. 2,000 calorie a day is used for general nutrition advice.
- Ensure the water used in the dough is lukewarm. Water that is too hot can kill the yeast, while water that is too cold may not activate it properly. Aim for a temperature between 110°F to 115°F (43°C to 46°C).
- Patience is key when it comes to rising the dough. Let it double in size during the first rise, and after shaping the individual portions, allow them to rest briefly before cooking. This helps the gluten relax and makes the dough easier to work with.
- Before cooking the pita bread, make sure the skillet or griddle is thoroughly preheated. This high initial heat is crucial for the rapid puffing of the dough, creating the characteristic pocket in the pita bread.